
Mirror Photo Edit Collage
Create a unique variation in your images with more than 22+ mirror effects, defining a new way of adoring yourself in personal photos.

Create a unique variation in your images with more than 22+ mirror effects to redefine the way you adorn yourself in personal photos. Make a stunning and bold statement with magnificent effects through the easy-to-use save and share features on your Windows device.
Mirror Photo Edit Collage offers over 22 dynamic mirror effects for creating cool images, along with multiple filters such as artistic, sepia, negative, etc. The app also provides over 100 stickers to choose from and add to your images. Users can apply cool text designs and classy patterns, and there’s a Crop tool for easy image cropping, as well as a rotation button to adjust the image orientation.
Mirror Photo Edit Collage is a lightweight application that won’t consume much space on your devices. It boasts an intuitive design and user interface with elegant shapes and blurred background designs. Instant sharing on social networking platforms makes it a more social app, allowing you to share your work with friends and family. The app supports resizable collages of 2, 3, 4, and 5 grids, as well as free-form collages. Pick the layout that suits you best, choose photos from your gallery or capture them with the inbuilt camera, and see them laid out in a cool collage. Easily resize the grid to meet your needs.
Combined with basic functionality and powerful features, this app fulfills all your requirements for a photo editor. Free-to-use functions allow users to take advantage of the well-polished features of the app to revolutionize mobile photography. Control the opacity and blur levels of your images to make them more realistic and natural. You can also adjust mirror photos within impressive frames, shapes, and text patterns.
Collages help you keep multiple images in one place, creating a lovely and astonishing display in different columns and beautiful patterns. The Collage feature in our application is designed to help you beautify your images.
Step 1: Launch the Application
Once you have successfully installed the application on your PC or laptop, open it.
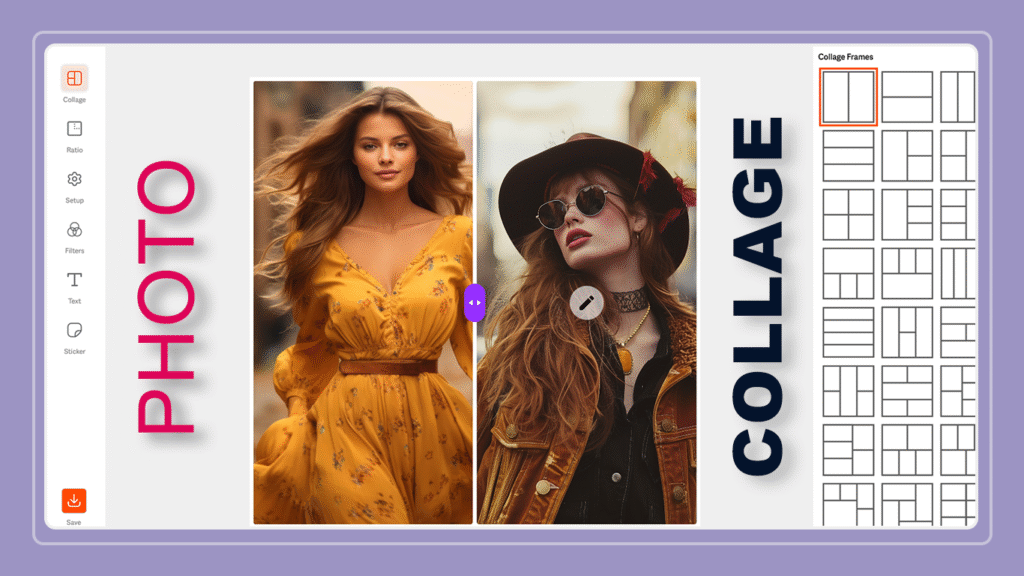
Step 2: Select the Photo Collage Option
Click on the Photo Collage option to start creating your collage. This feature allows you to combine multiple images into one layout.
Step 3: Choose Your Photos
After selecting Photo Collage, a file browser window will open. Choose two or more images from your system gallery that you’d like to include in your collage. Once selected, click Open to import them into the app.
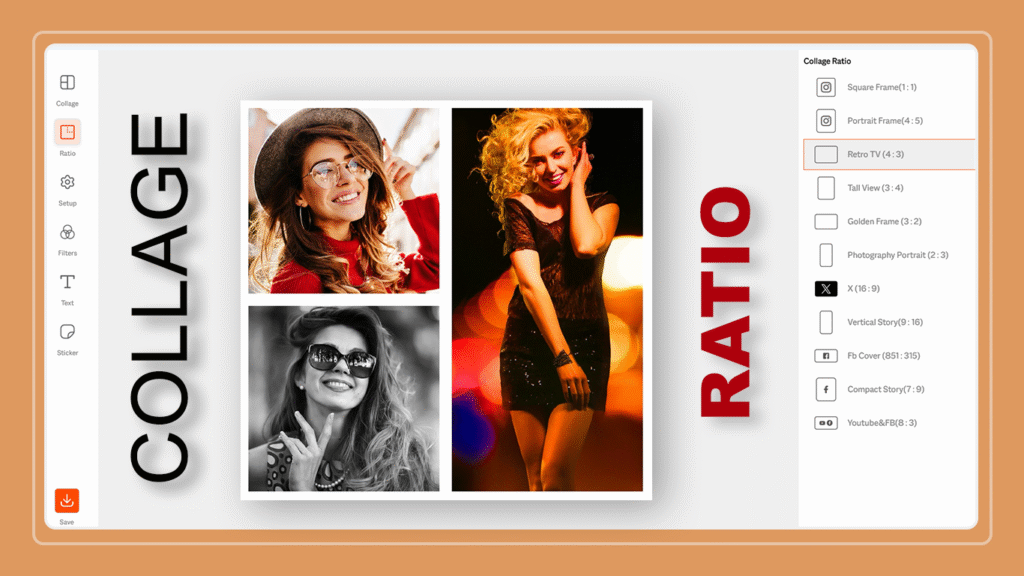
Step 4: Set the Collage Ratio
Click on the Ratio icon from the toolbar on the left side of the screen. You’ll see several preset ratios such as 1:1, 4:5, 16:9, and more. Pick a ratio that best fits your intended platform or purpose (for example, 1:1 for Instagram or 16:9 for wide layouts).
Step 5: Select a Collage Layout
Next, click on the Collage icon from the toolbar. Browse through the available collage frames and templates. Each layout offers different grid styles and image arrangements. Select your preferred frame, and the app will automatically position your selected photos.
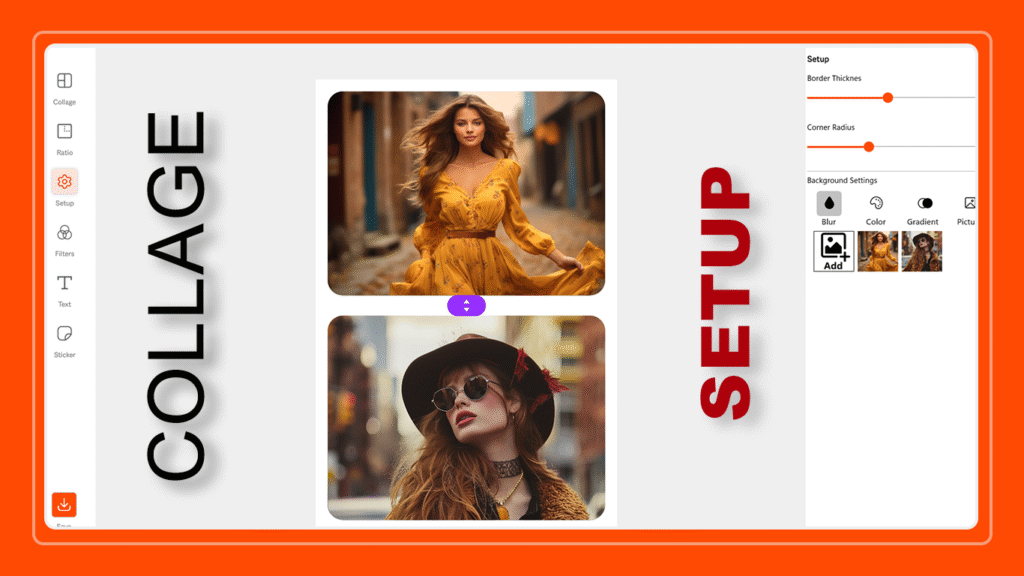
Step 6: Adjust the Setup
Click on the Setup option to fine-tune your collage. In this section, you can adjust the border thickness, corner radius, and background settings. The background options include Blur, Color, Gradient, and Picture. You can also modify the spacing between photos and further refine the corner rounding. Use the sliders or enter specific values to customize the collage layout exactly the way you want it.
Step 7: Apply Filters
Choose the Filters option to enhance your photos. Try different filters to find one that improves brightness, contrast, or color tone. You can apply filters to all photos at once or individually.

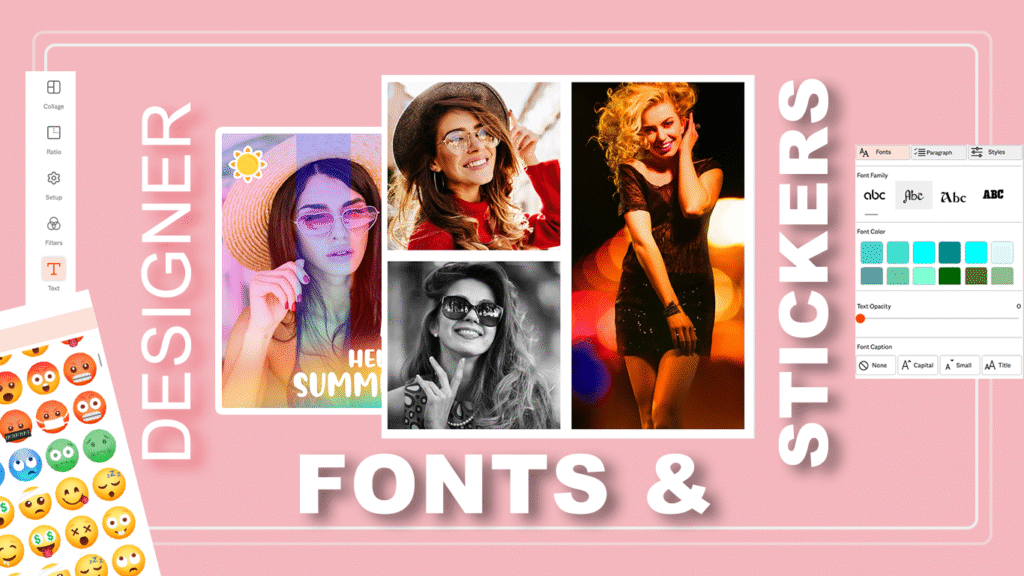
Step 8: Add Text
Click on the Text icon to add captions, quotes, or titles. You can edit the font style, color, size, and alignment. Move the text freely around the collage until it looks right.
Step 9: Insert Stickers
If you want to add fun or decorative elements, select the Sticker option. Browse through the sticker library and choose the ones that match your collage theme. You can resize, rotate, and place them anywhere on your collage.
Step 10: Save Your Collage
Once you’re happy with your design, click the Save button at the bottom of the toolbar. Choose a file format and save location on your computer. Your finished collage will then be ready to share or print.